Importing a Laboratory Application
The AB Manager electronic application is used to simplify and streamline the laboratory application and re-application process. The spreadsheet can be edited using either MS Excel or Google Sheets and includes three tabs or worksheets:
- Laboratory Details
- Key Positions
- Requested Parameters
Importing the Application
Prior to importing the application, it is created in AB Manager by the AB, then sent to the laboratory for completion. The laboratory updates any changes to laboratory details, key positions, and requested parameters and sends it back to the AB.
Completed applications are uploaded to AB Manager on the Setup/Applications page. Simply drag-and-drop the file or click the landing zone to select the file. The application file will be automatically identified with the laboratory name and other available information.

Laboratory Info Tab
The Laboratory info tab allows the AB to easily identify any changes that have been made to the laboratory details or key positions. Changes are highlighted in green as shown here:
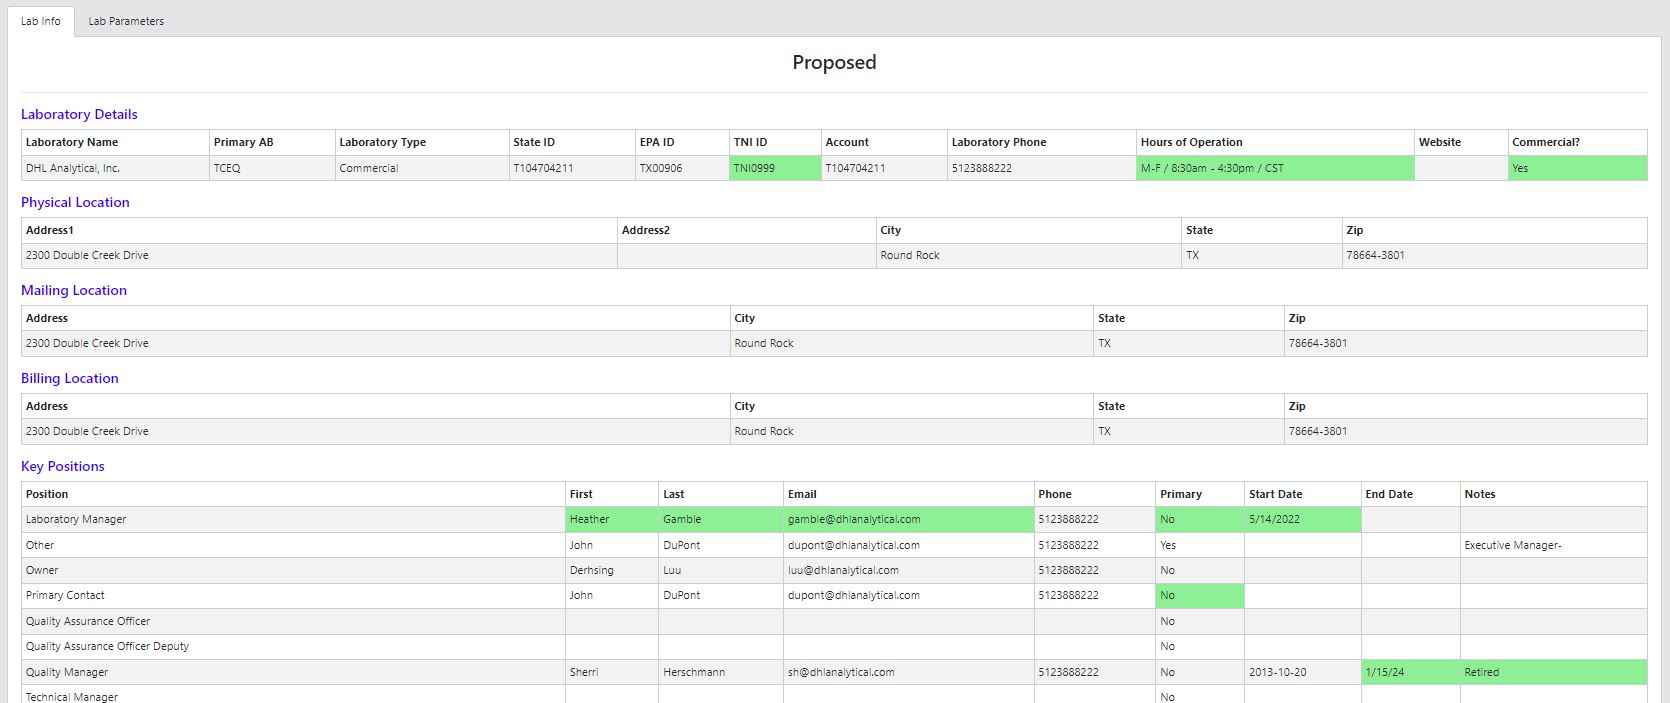
As a quality control step, the AB must manually update the laboratory details and key positions. One approach is to:
- Open a second laboratory screen in a new window by right-clicking on the laboratory name at the top of the import screen.
- Make necessary changes to the Lab Details tab.
- Note that adding a new key position requires the person to be in the lab contacts first. See this article for more information on managing contacts and key positions.
Lab Parameters Tab
The Laboratory parameters tab allows the AB to easily identify any changes that were made by the lab to the requested parameters or fields of accreditation. The tab specifically shows which parameters are unchanged, added, or removed:
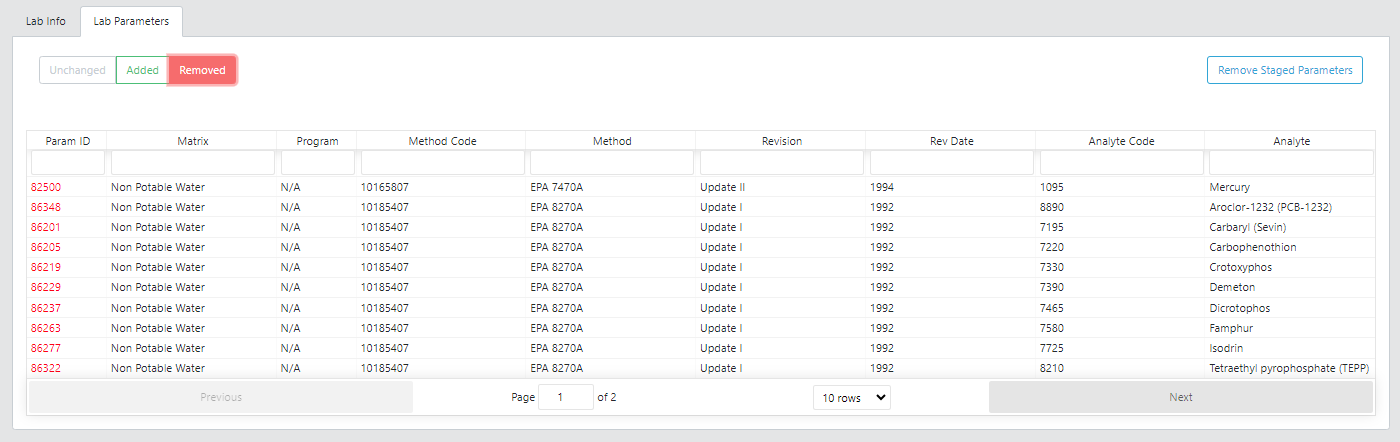
As a quality control step, the AB must determine if the proposed changes should be made to the Parameters page for that laboratory. One approach is to:
- Select the green “Added” button. Review the parameters on this list and then select the “Add Staged Parameters” button. Adding staged parameters will add the new parameter(s) to the laboratory’s parameters tab. New parameters will have approval set to “No” and be missing a start date. Parameters that have been mistakenly added can be easily identified and removed.
- Select the red “Removed button. Review the parameters on this list and then select the “Remove Staged Parameters” button. Parameters that have been mistakenly removed must be manually added back to the parameter page. The original application that was sent to the lab is one means of identifying which parameters have been removed.